IKEA Trådfri Garage Opener
Modifying an IKEA Trådfri mains switch to become a potential free/non voltage relay, using only two components, even leaving the mains outlet free for other use.
The IKEA Trådfri (or Tradfri) smart home system is inexpensive and widely available, but limited in functionality. If you want more, for instance a simple relay (not connected to mains), you need to get it somewhere else, often necessitating the install of another Zigbee controller in addition to the IKEA one. Instead, I modified a Trådfri outlet switch to become a potential free relay to control the garage door.

The IKEA Trådfri outlet switch, as is, allows you to control one phase of a mains outlet on/off. By adding a solid state relay it now instead controls whatever is connected, e.g. a garage door. Optionally, you can also bypass the mains relay so the mains outlet is left always on.
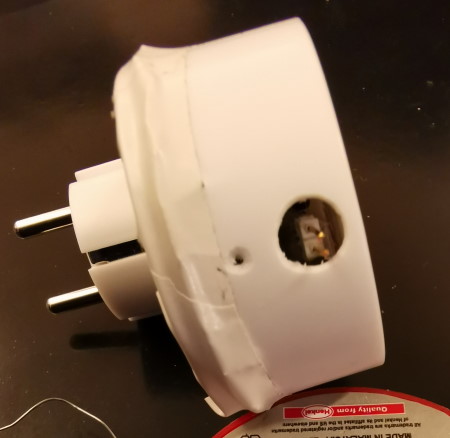
The first step is to gut it open. The one single screw looks promising, but the case is also heavily glued so expect to spend some time prying with a knife while swearing. Take care not to bend the knife too far inwards as it may damage components along the edges. It would probably be just as wise to cut the whole thing open with a dremel.
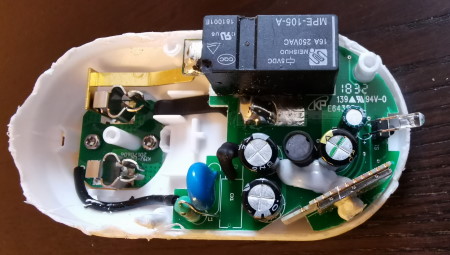
When looking for somewhere to connect our stuff, the white LED at the right is perfect. It is used to indicate on/off, and as luck would have it, the input side of a solid state relay electrically also behaves like a LED.

Snip it off, and find a solid state relay, such as the CPC1035N, and two pins. Any solid state relay will work, thought. If you’re into details, I have attached the datasheet.
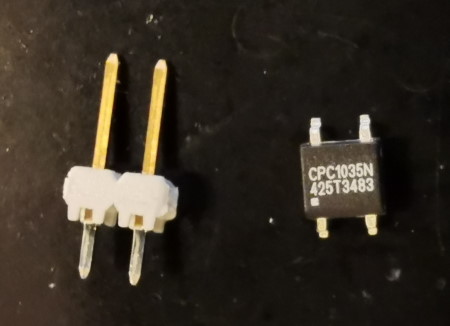
The dot on the relay package is placed on the positive input. The IKEA PCB helpfully also has a + to show the positive LED input.
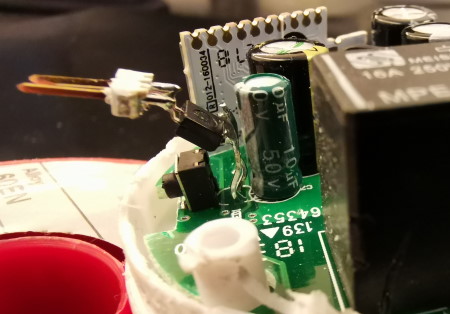
The parts are small and the soldering joints very fragile. Bring on the glue.
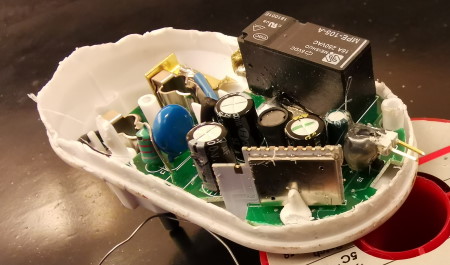
Optionally, you can cut the yellow metal connector from the relay to the mains, and connect the top mains phase to the bottom one with a short wire of appropriate dimension. This ensures the mains is always on, and the new improved relay does not occupy a mains outlet all by itself. Do keep in mind this is mains power so skip this step if you don’t know what you are doing.
Drill an 8mm hole in the top case and assemble.
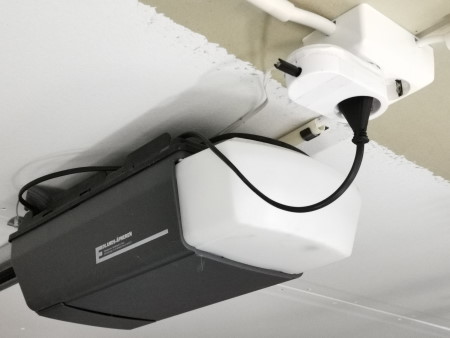
The finished modified switch installed to control the garage door – and providing an always-on mains outlet for the garage door itself.
If you are using the IKEA app or the on/off button to control the relay, you will need to click on-then-off. But if you, like me, have a home control web page and are using a script to connect to the IKEA gateway API, you can provide your users with a simple toggle switch performing both operations with a slight delay automatically.